How to photograph small handmade items with a phone and window light
· Editorial team denvernewslucy.com
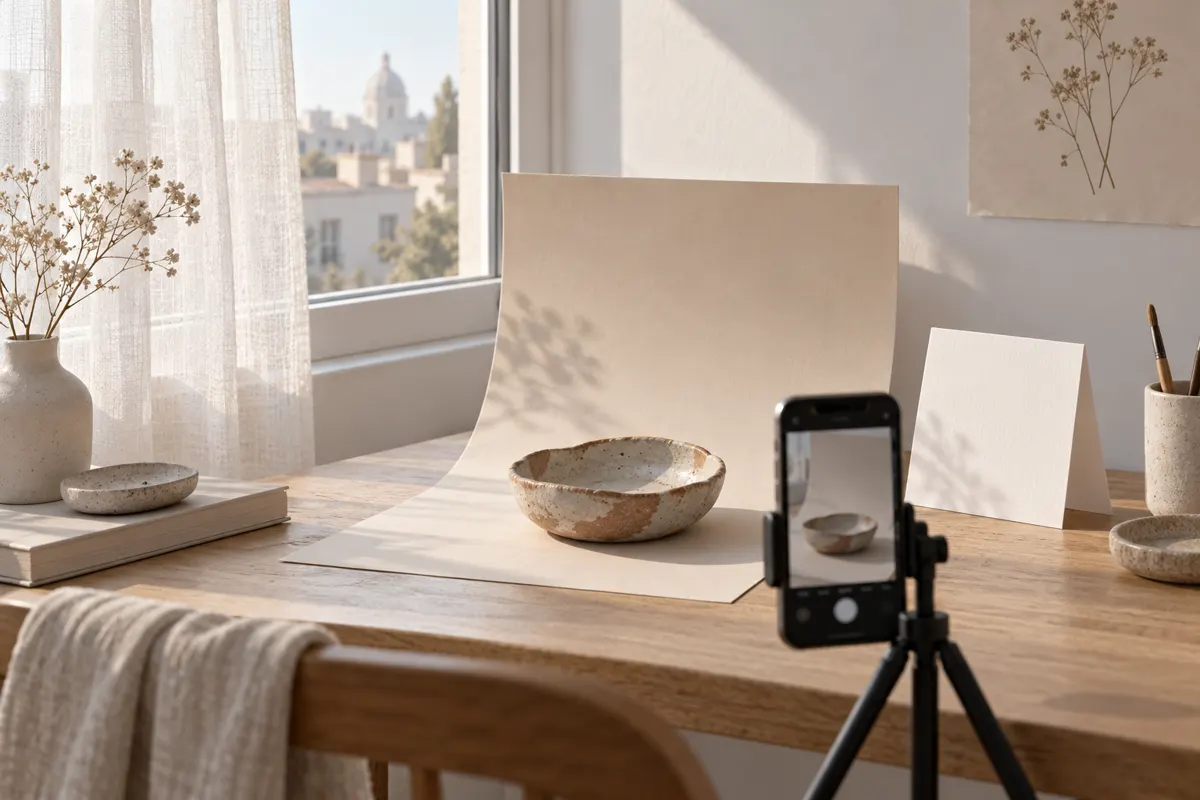
Place your handmade item on a plain background beside a window with indirect daylight, turn off the room lights, and steady your phone before shooting. A sheet of white paper or card can soften shadows from the opposite side. Keep that setup in place while you photograph the whole item, its details, and how it is used.
Build a small, repeatable tabletop setup
Use a table, desk, or other stable surface near a window. You only need enough clear space for the item and its background. Gather your phone, plain paper or fabric, and a piece of white card if you have one. Remove dust, fingerprints, loose threads, and distracting clutter before arranging the shot.
- Choose a quiet background that separates the item from its surroundings. Pale gray paper can help a white object stand out; cream or plain wood may suit darker pieces.
- For an upright item, curve a sheet of paper from a vertical support onto the tabletop without creasing it. This avoids a visible join behind the product.
- For flat items such as cards, coasters, or jewelry, lay the background flat and photograph from above.
- Leave enough background around the item to allow a small crop later.
Soften the window light and control shadows
Start with the window beside the item. Look at the shadows on your phone screen: gentle shading can reveal shape and texture, while a hard, dark edge suggests direct sunlight. Choose your shooting time by the light actually reaching your table, rather than assuming a particular hour will always work.
- If sunlight falls directly across the surface, move the setup out of the beam or soften it with a sheer curtain.
- Turn off nearby lamps and ceiling lights, and leave the phone flash off, to avoid mixing light sources.
- Fold white card so it stands opposite the window. Move it closer if the shaded side of the item needs more light.
- Rotate glossy pieces slightly and check whether reflections hide their finish or decoration.
Take a comparison photo with and without the white card. Keep the version that shows the material clearly. You do not need to remove every shadow; the aim is to make the item easy to understand.
Keep the phone steady and check the details
Wipe the camera lens with a clean lens cloth before shooting. Support your elbows on the table or rest the phone against something stable, keeping the lens unobstructed. For a front view, hold the phone upright so straight sides remain straight. For a flat lay, position it directly above the arrangement.
Take several frames at each angle, then enlarge a photo to inspect the stitching, lettering, or surface texture. If the important detail looks soft, steady the phone and try again. Check the frame edges too: a stray background corner or an accidentally cropped handle can be easy to miss while concentrating on the center.
Capture a useful five-photo set
The following proposed five-photo set gives a small handmade item a clear introduction without requiring five different setups. Keep the background and lighting in place, changing the item’s position and your viewpoint.
- Whole item: show the complete piece clearly, with no props covering it.
- Second angle: reveal its depth, side, back, or underside, whichever adds useful information.
- Detail: move closer to show a seam, clasp, glaze, carving, or other distinctive feature.
- Scale: include a ruler or show the item in a hand, keeping it clearly visible.
- Use: show a believable arrangement, such as a handmade dish holding jewelry or a card beside its envelope.
Use props sparingly. Their purpose is to explain size or function, so move them toward the edges and keep the handmade piece prominent.
Keep colors consistent and save the setup
Photograph related pieces together while the daylight is similar. Select the clearest frames, straighten them, and crop distracting edges. Make modest brightness and white balance adjustments while comparing the photo with the actual item in daylight. Avoid edits that change the apparent color or hide the material’s texture.
As a practical proposal for repeating the session, save a quick picture of the tabletop arrangement and note the background, window position, and approximate shooting time. Next time, rebuild that arrangement and check the light again before photographing the full batch.